|
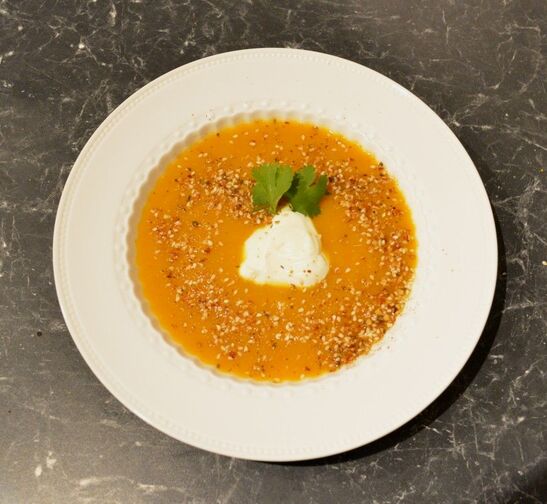
It is Halloween, now I am not really a Halloween enthusiast (it isn't something we did as kids), I don't really throw parties or participate in it, but I do dabble in it from time to time for my kids sake and have been to a few parties over the years. Here are a few things I have made. Cocktail Sausage Mummies: These were easy and look great on a Halloween table. Frankfurt Fingers: There is no recipe here, just cook some frankfurts, then try and ,ake them look like bloody fingers. Pumpkin Soup: It is the time of the year where pumpkins are everywhere, so I have to make a soup. Hags Fingers: Simply crumb chicken breasts that are cut into finger shapes with with breadcrumbs or polenta. Use egg to 'stick' on a flaked almond as a nail. Then pan fry or oven bake them until cooked through. Halloween Chocolate Mousse: This chocolate mousse is creamy and smooth and absolutely delicious. Gingerbread Men: This was my daughter's idea as she loves gingerbread men for Christmas, these Halloween gingerbread men turned out great. Red Velvet Cupcakes: I haven't posted the red velvet cupcake recipe yet, but if you have one just decorate them in a halloween theme. Jelly Custard Cups: Another fun one where you make the custard look like brains in the glass. The red colour looks great, but I can't resist all the colours. Spiders: These are simply just fun. Kids Party Punch: If you buy halloween ice trays, this is a great addition to your halloween table. So there you have it, a few easy Halloweem Party ideas.
0 Comments
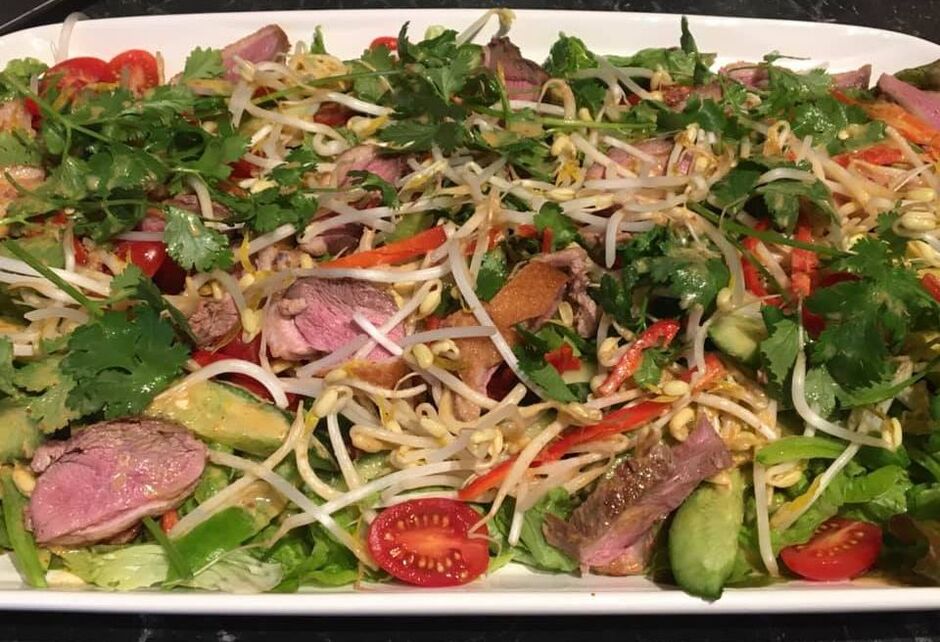
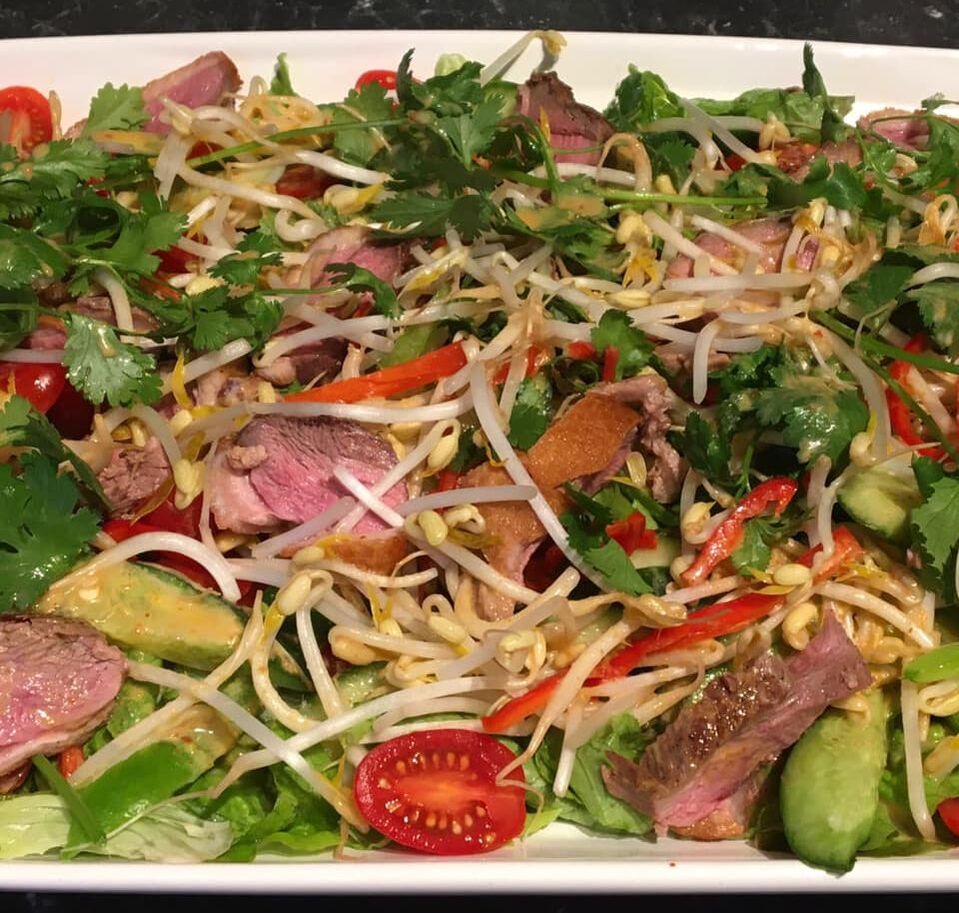
Recently we were told about an absolutely delicious Thai Duck Salad from a local restaurant Bangkok Bites in Bondi by one of our family friends. It was delicious, actually everything we ordered was delicious. But as I am who I am, I wanted to see if I could find a recipe that was similar to the salad that we ate and this is my answer to it. This salad is delicious, it has such a lovely fresh flavour to it. I added salad leaves to it, to bulk up the meal, and there is definitely enough dressing to do so. As for the dressing, if you find it sweet, add more lime, add more curry paste if you like. The recipe is great, just adjust it to how you would like it. If you prefer you can start to cook the duck in a frying pan, but once you turn it over, you can finish cooking it in a 180C preheated oven for 6-8 minutes, or until cooked to your liking. I do both methods, you achieve crispier skin in the oven, I just sometimes don't feel like using my oven. I doubled the original recipe, so just halve it if you need to make less. This is a salad my family loves, hope yours does to. RecipeRecipe adapted from www.luvaduck.com.au/ Serves 6-8 4 duck breasts, skin on, scored 4 Lebanese cucumber, halved, sliced on the diagonal 300g snow peas, stringed, thinly sliced 400g cherry tomatoes, halved 2 cups bean sprouts 2 long red chillies, deseeded, finely sliced 1 cup coriander leaves 3-4 handfuls washed salad leaves Dressing: 1 cup coconut milk 6 tablespoons lime juice 2 tablespoons brown sugar 2-3 teaspoons Thai red curry paste (to your taste) 1 teaspoon fish sauce Fried Asian shallots and lime wedges, to serve Place the duck, skin-side down, into a cold frying pan. Start the cooking process on a low heat and gradually bring the heat up to medium-high. Once you start to here a sizzle, cook for 6-7 minutes skin side down (your aim is to render the fat and form a crispy golden skin) then turn over. Cook for a further 6-7 minutes or until cooked to your liking. Transfer to a plate and rest for 5 minutes. Thinly slice duck. Meanwhile, in a large bowl place the cucumber, snow peas, cherry tomatoes, bean sprouts, chilli, and coriander. To make the dressing, place all ingredients in a screw top jar and shake well to combine, adjust the taste if needed. Drizzle salad with half the dressing and toss to coat. Top salad with sliced duck, drizzle with remaining dressing and garnish with fried shallots and lime wedges, to serve. Enjoy! To save the recipe to your favourites go www.whatscookingella.com/thai-duck-salad.html
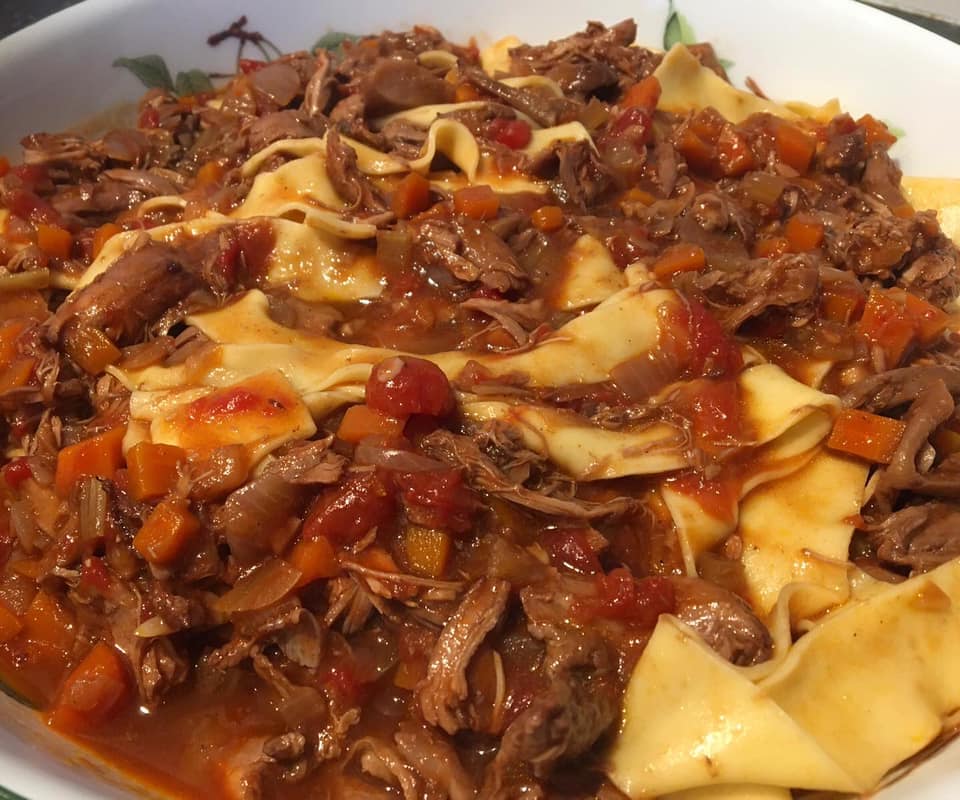
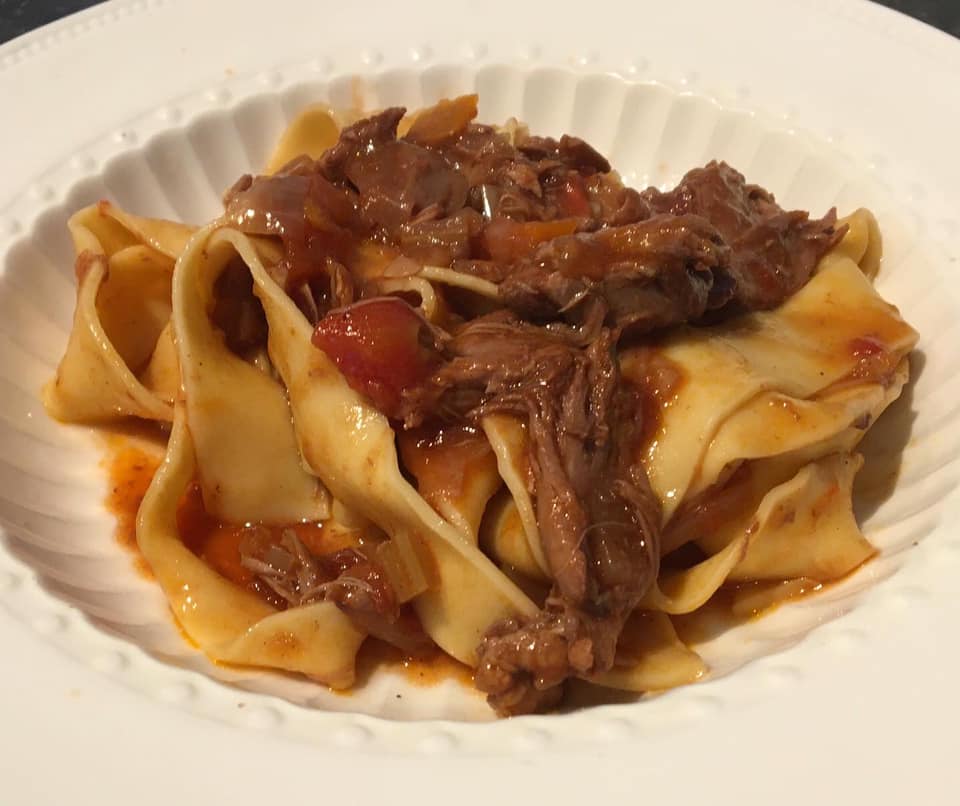
Pin it: www.pinterest.com.au/pin/399413060708197403/ My family love duck, it is one of those things I cook that everyone is looking forward to dinner once I mention I am cooking duck. This ragu is delicious. It is very easy to make and has a lovely flavour to it. Duck marylands are legs and thighs joined together. If you can't find duck marylands, you can buy two whole ducks. I will share recipes on how to use up the whole duck. It is actually far cheaper to do this than buy a duck jointed. Homemade pasta is far superior to packet pasta, it does involve a little effort, but if you have the time, try making it. If you don't have time, buy pappardelle, there are many great brands out there today, it will still taste great. So if you are looking at trying something new, try this ragu, it's simple and tasty and one my family love, hope yours does to. RecipeRecipe adapted from www.foodnetwork.com/ Duck Ragu: 4 duck marylands, skin removed 4 tablespoons olive oil 1 medium Spanish onion, diced 1 carrot, peeled, finely diced 2 cloves garlic, peeled and thinly sliced 1 celery stalk, diced 240ml red wine 400g tin diced tomatoes 1 cup chicken stock 30g dried porcini mushrooms Pasta: Find my fresh egg pasta recipe here the quantity I make for this sauce is for 4-5 people Make your pasta dough now, let it rest for 30 minutes, while you start the sauce. All instructions are in the link above. Place dried mushrooms in a heatproof bowl. Add enough boiling water to just cover the mushrooms. Leave to soak while you get on with the recipe, about 20 minutes is needed. In a thick bottomed saucepan or cast iron pot, heat olive oil until hot. Add duck marylands and cook until brown on all sides, about 6-8 minutes. Remove from pot, set aside until needed. Add onion, carrot, garlic and celery, cook, stirring, until softened, about 5-6 minutes. Add wine, tomatoes, chicken stock and dried mushrooms and the soaking liquid, bring to the boil. Add duck marylands and return to the boil, lower heat, cover, and allow to simmer for 1 hour. Roll out your pasta now. Cut into pappardelle shape. Remove duck marylands and allow to cool, until cool enough to touch. Pull off all the meat from the bones and return the meat to the pot, discard bones. Simmer, uncovered, for 30 minutes, or until the sauce is quick thick. Season with salt and pepper and set aside. Cook the pasta: Fill a large pot with water, add 2 tablespoons salt and bring to the boil. Boil pappardelle until cooked, about 1 minute and drain well. Put hot pappardelle into hot ragu and toss well. Serve immediately. Enjoy! To save the recipe to your favourites go www.whatscookingella.com/duck-ragu-with-pappardelle.html
Pin it: www.pinterest.com.au/pin/399413060708196973 Chocolate Coconut Brownies-a new family favourite dessert. Think bounty chocolates but in a brownie form. Super easy to make and do not last long once made. My family love these, hope yours does to. RecipeRecipe adapted from cookingwithmanuela.blogspot.com/ Makes 16-20 pieces For the brownie layer: 100g (1/2 cup, packed) brown sugar 50g (1/4 cup) caster sugar 70g (1/2 cup) plain flour 25g (1/4 cup) cocoa powder 1/4 teaspoon salt 1/2 teaspoon baking powder 60g unsalted butter 40g (1/3 cup) dark chocolate chips 1 teaspoon vanilla extract 2 eggs For the coconut layer: 250g (3 cups) shredded coconut 1 x 395ml can sweetened condensed milk Chocolate Ganache: 60ml (1/4 cup) thickened cream 1/2 cup milk chocolate chips Preheat the oven to 180°C/160°C. Line a 22cm x 22cm square baking pan with baking paper. Make the brownie layer: In a large bowl add the brown sugar, caster sugar, flour, cocoa powder, salt and baking powder. Mix to combine. In a separate bowl, add the butter cut in pieces and the chocolate chips. Place bowl over a pan of simmering water making sure the water does not touch your bowl. Add the melted chocolate, with the eggs and vanilla extract to the dry ingredients and mix until combined. Pour onto the prepare pan and flatten it out with a spatula. Make the coconut layer: In a separate bowl, stir the coconut with the sweetened condensed milk. Mix to combine. Add spoonfuls of the coconut mix on top of the chocolate layer. Gently spread and make a full layer. Bake in preheated oven for about 35 minutes or until set. It needs to feel set, but not hard, as it will harden on cooling. Let cool. Make the Ganache: Melt the chocolate chips with the thickened cream in a small saucepan over low heat. Stir until smooth and completely melted. Drizzle on top of the coconut layer. Place it in the refrigerator for at least half hour to set and cut into 16 small squares. Decorate with more shredded coconut if you like. Enjoy! To save the recipe to your favourites go www.whatscookingella.com/chocolate-coconut-brownies.html
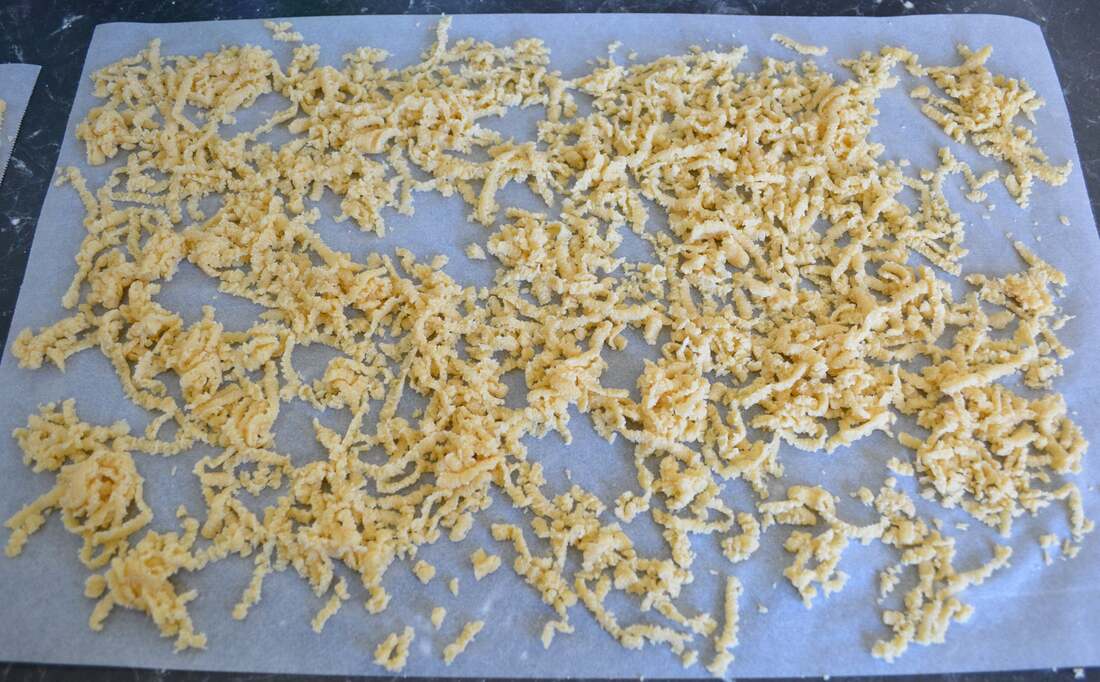
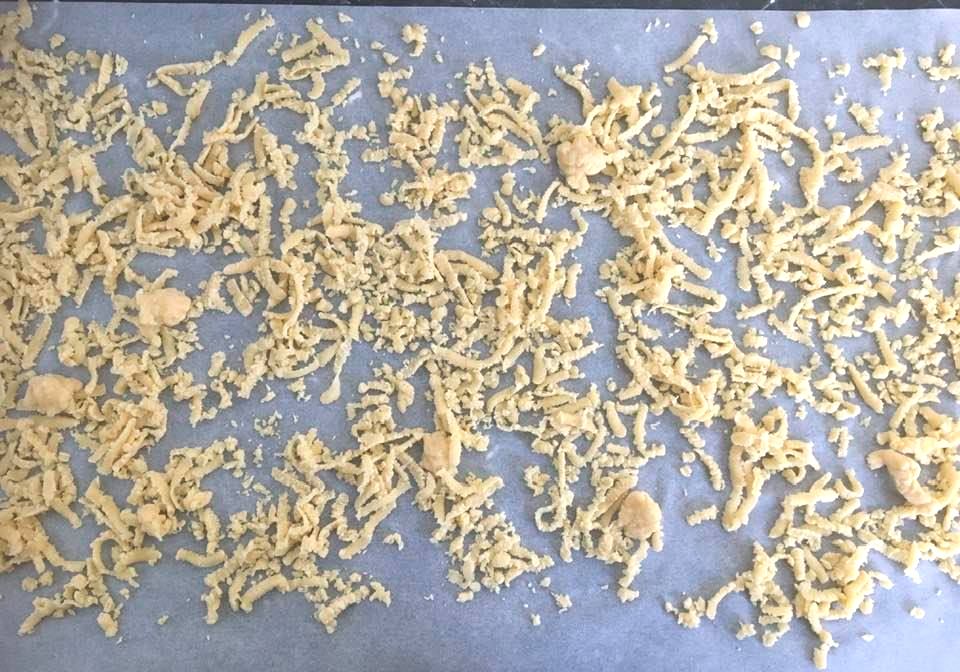
Pin it: www.pinterest.com.au/pin/399413060708200889/ Today I'm going to give you two recipes for making grated pasta dough for soup. One is with flour, semolina and egg, the other will be just using flour and egg. Both are great, so I just figured I'd share both, and then you can make which ever one you want. Grated pasta dough in Croatia goes by many names. My mum calls them tarce, I found recipes calling it tarana za juhu, some call it ribana kasica. Your dough needs to be firmer than your normal pasta dough as you need to grate it, so it is a labour of love kneading this dough. But as my family absolutely love this, I am happy to make it for them. If you make more than needed, just allow the grated dough to dry out completely, then you can store them in a container for another day. Dried dough will need to cook longer than the fresh dough. You can see in the picture below that there are a few larger balls of dough, that is my daughters doing, she loves a few random larger balls of dough. Just eat them on the first day as they will be hard to dry and if they do dry, they would take forever to cook. I love cooking things my mum says she had when she was little, so this is something I make for my family to keep traditional food memories going on. This is something I serve with clear broth type soups, either chicken. duck, beef or lamb soup. RecipeServes 6 Tarce using flour and egg: 1 x 60g egg 3/4 cup pasta flour 1/2 teaspoon salt Put egg, 1/2 cup flour and salt into a food processor. Add the remaining flour spoon by spoon, it should look like couscous. Turn the mixture out onto your kitchen bench. If you don't have a food processor add all of the flour and salt onto your kitchen bench, mix the egg into the flour using a fork or your fingers, until the mixture starts to come together. For both methods now, knead by hand to form a ball, the dough must be hard. If it is too crumbly, you can add a teaspoon of water, only add enough water where the dough can come together. Remember the dough needs to be hard. Wrap the dough in plastic wrap and place in the freezer for 30 minutes before grating. Grate pasta dough on a box grater, using the larger holes. Scatter over a tablecloth or baking paper. If you are going to use freshly grated dough, allow let it to dry for one hour before adding it to soup, so they don't stick. For later use dry them overnight, when it has dried, store in an airtight container. Serves 12-you can halve the recipe Tarce using flour, semolina and egg: 300g pasta flour 200g semolina 1 teaspoon salt 4 x 60g eggs Add the flour, semolina and salt onto your kitchen bench, mix together to combine the flour and semolina. Mix in the egg into the flour mixture using a fork or your fingers, until the mixture starts to come together. Knead by hand to form a ball, the dough must be hard. If it is too crumbly, you can add a teaspoon of water, only add enough water where the dough can come together. Remember the dough needs to be hard. Grate pasta dough on a box grater, using the larger holes, you can cut the dough into 4 smaller pieces to make it easier to grate. Scatter over a tablecloth or baking paper. If you are going to use freshly grated dough, allow let it to dry for one hour before adding it to soup, so they don't stick. For later use dry them overnight, when it has dried, store in an airtight container. Enjoy! To save the recipe to your favourites go www.whatscookingella.com/grated-pasta-dough-for-soup.html
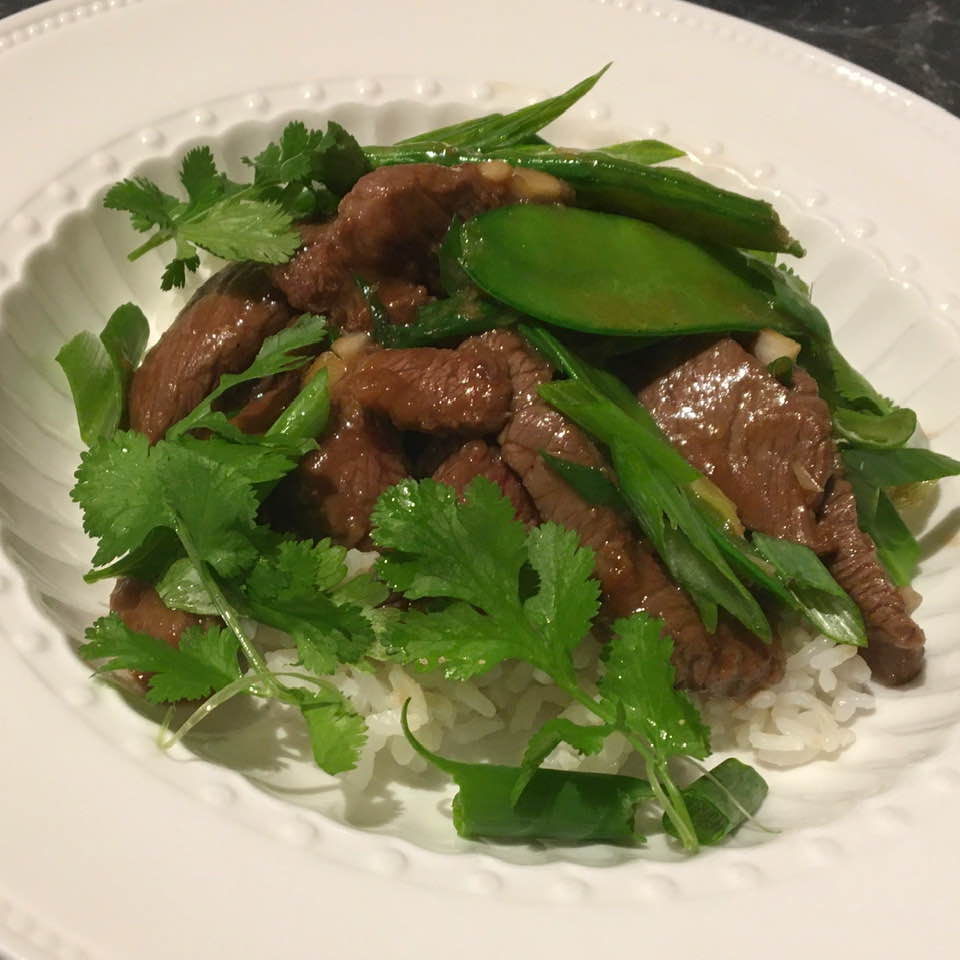
Pin it: www.pinterest.com.au/pin/399413060708200081/ I have tried a few mongolian beef recipes, but this has been my families absolute favourite. It's quick and easy to make and is absolutely delicious. I used snow peas as we had them growing in the garden, but it would be just as nice with broccoli, I head of broccoli, cut up into small florets, is what is needed. Sometimes when you fry the beef in batches, the cornflour in the marinade can burn in your wok, after the second batch, just wipe down the wok if needed and continue with the recipe. This is simple and delicious, after a little preparation, this meal comes together quickly for a perfect mid week meal. My family loves this, hope yours does to. RecipeRecipe adapted from cafedelites.com/ Serves 4-5 1kg beef rump steak, thinly sliced 2 tablespoons water 1 tablespoon soy sauce 1 tablespoon Shaoxing (Chinese) wine 2 tablespoons cornflour Sauce: 1/2 cup low sodium soy sauce 2/3 cup water 1/3 cup brown sugar 2 tablespoons hoisin sauce 1 tablespoon oyster sauce 3/4 tablespoon ground white pepper (or 1-2 teaspoons red chilli powder) Stir Fry: 1/4 cup oil 1 teaspoon sesame oil 8 cloves garlic, minced 1/2 tablespoon minced ginger 200g snow peas 4 green onions, thinly sliced 1 tablespoon cornflour mixed with 2 tablespoons water To serve: Extra sliced, green onions Fresh coriander leaves Rice Whisk marinade ingredients together until well combined. Marinate the beef slices for 30 minutes to an hour. Do not refrigerate the meat during this time, as you don't want the meat fridge cold when frying, as it will stew rather than fry. Just leave it on the bench while you prepare the rest of your meal. While beef is marinating, whisk together the sauce ingredients until well combined. Set aside while you prepare the stir fry ingredients. Heat up a wok over medium-high heat with the 1/2 of the oil. When oil is hot, stir-fry the marinated beef in batches of four (don't crowd the wok) until they are just crisp on the edges, about 2 minutes. Remove the meat, leaving as much oil in the wok, and set aside. Continue with remaining batches and add more oil, when needed. Heat up the sesame oil in the wok with any remaining oil, and stir-fry the garlic and ginger until fragrant. Add the snow peas and stir fry until they are vibrant in colour and just tender. Add the beef back into the wok with the prepared sauce. Simmer in the sauce until the beef slices are cooked through (about 2 minutes); add the cornflour mixture and the sliced green onions. Cook for a further minute or until the sauce thickens. Garnish with extra green onion slices and fresh coriander leaves and serve immediately over rice. Enjoy! To save the recipe to your favourites go www.whatscookingella.com/mongolian-beef-and-snow-pea-stir-fry.html
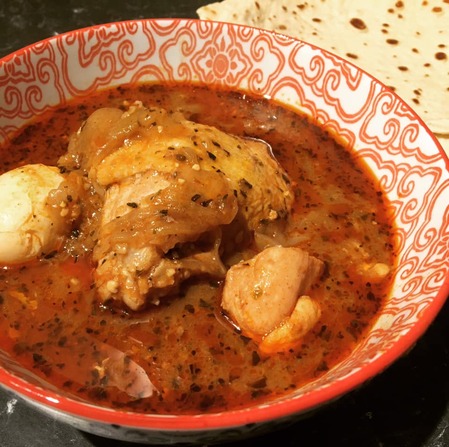
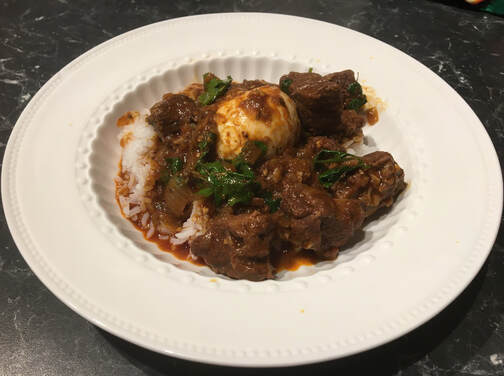
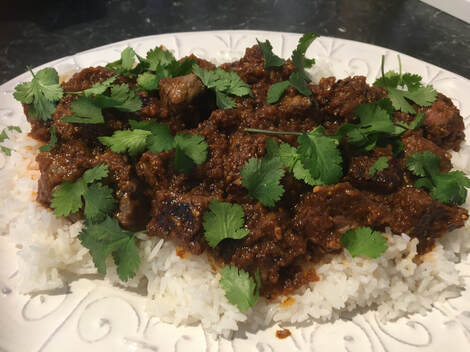
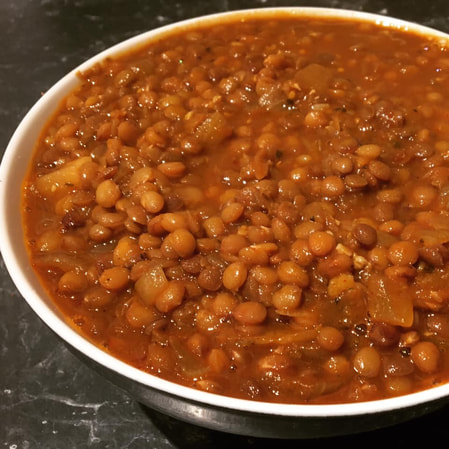
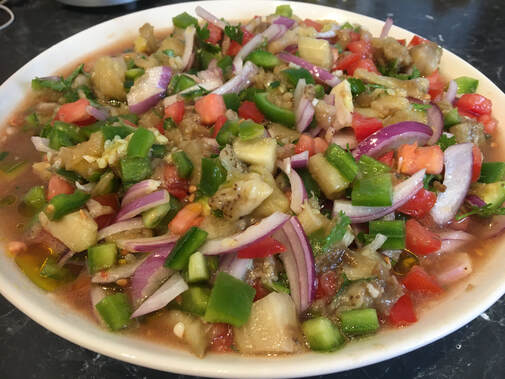
Pin it: www.pinterest.com.au/pin/399413060708162118 The 13th country in our Eating Around the World Adventure is Ethiopia. From what I have found, Ethiopian food is based on spicy stews/curries called wats. The food I have tried is packed full of flavour from the spices they add to their food. Meat is really only eaten on special occasions, most meals are vegetable or legume based. I never tried injera bread which is the traditional bread to eat wats with. It is bread that is thicker than a crepe but thinner than a pancake. They don't use utensils in Ethiopia, so the bread is the vessel used to pick up the stews. Instead I served it with flat bread, I'm sure not the same, but it worked, I just wasn't sure about following the recipes I found for injera, so I didn't make it. Maybe one day. What I love about Ethiopian food is that it feeds a crowd, even the way Ethiopian food is served, on a communal platter, is designed for sharing food with each other. Food is not meant to be eaten alone in Ethiopian culture. I was pleasantly surprised with Ethiopian food, and doing this little adventure with my family has been great. We have tried flavours that if we didn't do this, we may never have tried. I do love that my family have given everything I cooked a chance. They have tried all the new flavours they have been introduced to. Visiting Ethiopia on our food journey is something I have loved and many dishes I will make again and again. Here is what I made Berbere Spice Niter Kibbeh-Spiced Butter Doro Wat-Chicken Stew Sik Sik Wat-Beef Stew Beef Tibs Lentil Stew Lentil and Tomato Soup Eggplant and Tomato Salad Berbere Spice: Berbere means hot, so this is a spice mix that adds flavour and heat to your dish. It is not crazy hot, it just adds a lovely heat to a dish. Now I have tried two versions of this spice mix, one I loved and used with my doro wat and lentil stew, and one I hated, that I used to make the lentil and tomato soup. The one I am sharing today was delicious, it adds a lovely flavour to your wat, it's easy to make and you can use it in all the dishes I specify berbere spice is needed. Here is how I made it: 3 tablespoons smoked paprika 2 tablespoons paprika 1 tablespoon ground ginger 1 tablespoon granulated garlic 1 tablespoon dried basil 1 teaspoon freshly ground white pepper ½ tablespoon ground cinnamon ½ tablespoon ground nutmeg ½ tablespoon fenugreek 1 teaspoon cumin 1 teaspoon ground cardamon 1 tablespoon or more Hot Chilli powder or cayenne pepper, to taste Combine all the ingredients in a bowl or jar, stir until well mixed, to combine. Niter Kibbeh-Spiced Butter: This is a spice-infused clarified butter that is ever- present in Ethiopian cooking with an great depth of flavor. Now the first time I made this clarified butter I used a recipe, won't do that again, the method used took forever to remove the milk solids from the butter. So I have modified this recipe only in how I clarify butter, after that I followed the original recipe. This butter smells great and adds such a lovely flavour to a wat. Here is how I made it: This makes more than you need for any one recipe, but it stores well in the refrigerator for up to a month. 450g unsalted butter 1 small onion, coarsely chopped 3 tablespoons finely chopped garlic 1 teaspoon ground cardamom 1 teaspoon fenugreek seeds 1 teaspoon ground cumin 1-2 tablespoons finely grated fresh ginger ¼ teaspoon freshly grated nutmeg 1 teaspoon dried oregano ½ teaspoon ground turmeric 5-6 fresh basil leaves Here is a video for the process to clarify butter, that I prefer. To clarify butter: Place the butter over a very low heat in a medium sized saucepan. Bring it slowly to a simmer. Turn off the heat. Skim off any white foamy bits that have come to the surface. Leave to cool slightly so that the milk solids drop to the surface of the saucepan. Once this happens, slowly pour the clear yellow clarified butter from the top into a clean small saucepan, stop when you have nearly reached the white milk solids. Now to the clarified butter add the onion, garlic, cardamon, fenugreek, cumin, ginger, nutmeg, oregano, turmeric and basil leaves. Bring to a slow simmer and simmer for 15-20 minutes. Pass through a fine sieve into a bowl or jar, and it is ready to use. Doro Wat: Chicken Stew: This was delicious. This is not an everyday dish in Ethiopia, this is special occasion food. I really loved these flavours. It was an easy recipe to follow. You first had to make the berebere spice mix and the spiced butter, both recipes are above this recipe. Now I served it with pita bread as I did not find a recipe for Ethiopian bread that I was willing to try, but it worked well, and again, it was easy, but I know, not traditional. I would definitely eat this again. Here is how I made it: Serves 6 Make the berbere spice mix. Make the niter kibbeh. 1 x 1.5kg whole chicken, you could use marylands or just thighs, if you prefer 3 tablespoons spiced butter 3 medium onions, sliced 1/4 cup canola oil 2 tablespoons Berbere Spice 1 tablespoon minced garlic ½ tablespoon freshly grated ginger 1 tablespoon tomato paste ½ tablespoon paprika 1 tablespoon dried basil 6 large soft boiled eggs 1-2 Lemons, freshly squeezed (adjust to taste) 1 tablespoon plain flour, if needed to thicken the sauce Salt and pepper, to taste Cut up the chicken into 8 pieces, season with salt and pepper. In a large pot, over medium heat, heat until hot. Add the spiced butter and onions. Sauté onions, stirring frequently, for about 7 -10 minutes, until translucent and starting to brown. After the onions are caramelized, add the oil, then add the berebere spice , garlic and ginger. Stir for about 2-3 minutes, for the flavors to blossom and the mixture has a deep rich brown color. Be careful not to let it burn. Add the tomato paste, stir through for 30 seconds. Then add the chicken pieces, give it a quick stir through. Then add about 2-3 cups water, just enough to cover the chicken. Add the paprika and basil. Season with salt and pepper, bring to the boil, simmer for about 40 minutes. In the meantime, soft boil your eggs. Peel the eggs. Once the 40 minutes has passed, if your sauce looks to thin at this stage add in a little plain flour mixed with water to thicken it, if it is too thick, you can add a little extra water. Add in the eggs and lemon juice; thoroughly mix to ensure that the eggs are immersed in the sauce. Continue cooking until chicken is tender about 10 minutes. Serve warm. Enjoy! Sik Sik Wat-Beef Stew-Like the chicken version above this was delicious. This is not an everyday dish in Ethiopia, this is special occasion food. I really loved these flavours. It was an easy recipe to follow. You first had to make the berebere spice mix and the spiced butter, both recipes are above this recipe. Now I served it with pita bread as I did not find a recipe for Ethiopian bread that I was willing to try, but it worked well, and again, it was easy, but I know, not traditional. I would definitely eat this again. Here is how I made it: Serves 4-6 900g chuck steak 1 lemon, juice 2 teaspoons salt 2 onions, finely chopped 3 cloves garlic, finely chopped 1 tablespoon freshly grated ginger ¼ cup niter kibbeh, recipe above 2 tablespoons ground paprika ¼ - ½ cup berbere paste made by combining 3 tablespoons berbere spice mixed with 1 tablespoon red wine and 1 tablespoon sunflower oil ¾ cup water or stock ¼ cup red wine 1 teaspoon cayenne pepper, depending on taste salt and pepper to taste 4-6 hard boiled eggs Rub stew beef with salt and lemon juice. Let sit for 30 minutes. Melt down niter kibbeh in a large pan. Add paprika to colour the oil. Add berbere paste and cook for 3 minutes, making sure not to burn. Add onions, garlic and ginger, cooking for 10 minutes until soft and most moisture is evaporated Add beef, water, wine and cayenne pepper. Simmer for 1 hour and 30 minutes until beef is tender and sauce has thickened. Add water as necessary to keep sauce a thick consistency. Season with salt and pepper to taste. Hard boil eggs if using and peel them. Add eggs to the wat and simmer for 15 more minutes before serving. Enjoy! Beef Tibs: This was one of my favourite dishes. It's super easy to make and one my family were surprised they would love, but they all really did love it. They ate it so quickly. This is definitely something I would make again. Here is how I made it: Serves 2-3 5 tablespoons niter kibbeh, recipe above 2 medium onions, chopped medium 7cm knob ginger, minced, about 2 tablespoons 6 medium cloves garlic, minced, about 2 tablespoons 2 tablespoons berbere spice, recipe above salt, to taste 455g beef sirloin, cut into 2cm cubes, trimmed of excess fat and connective tissue 1 teaspoon vegetable oil 1 teaspoon lemon juice, to taste Fresh coriander leaves, to serve Rice, to serve Melt niter kibbeh in a heavy saucepan on medium heat, then add onions, ginger, garlic, and berbere spice. Reduce heat to medium-low and cook, stirring occasionally, about 30 minutes, the onions will darken from the spices, but do not burn them. Onions should be at a low sizzle during cooking process. Adjust heat accordingly. Transfer to food processor and blend until not quite a purée. Return to saucepan, season to taste with salt, and keep warm. Season beef on all sides generously with salt. Heat oil in a 30cm frying pan over high heat high until lightly smoking. Add beef in a single layer, leaving plenty of open space in the pan (brown in batches if you don't have a large enough skillet). Cook without moving until well-seared on one side, about 3 minutes. Flip meat cubes with tongs and cook on second side until well seared. Continue to cook meat, stirring and flipping occasionally until desired level of doneness is reached. Toss beef with warm sauce, stir in lemon juice, and serve immediately with fresh coriander and rice. Enjoy! Lentil Stew: I really liked this, my kids said it reminded them of an Indian curry. The spice mix was lovely, I served it with bread, as I didn't make injera bread. It wasn't the same I would imagine, but it was still delicious. Because of the amount of flavour in this dish, I didn't even miss the meat. I would definitely eat this again and again. Here is how I made it: Serves 4 1 cup dry lentils, soaked for 2 hours 1-2 tablespoons niter kibbeh ¼ cup canola oil 1 large onion, diced 1 1/2 tablespoons berbere spice 2 teaspoons finely chopped garlic 1/2 tablespoon freshly grated ginger 1 teaspoon coriander or cumin 1-2 teaspoons smoked paprika 1 tablespoon tomato paste 2 cups Vegetable or Chicken Stock 2 tablespoons chopped parsley or coriander Salt and Pepper, to taste Soak lentils in cold water for 2 hours. Heat up a large sauce-pan over medium heat, add the spiced butter and oil, then add onion, berbere spice, garlic, ginger, coriander or cumin and smoked paprika, stir occasionally for about 2-3 minutes until onion is translucent. Then add drained lentils and tomato paste, stir and sauté for about 2-3 more minutes. Add the stock, season with salt and pepper. Bring to a boil and let it simmer until sauce thickens, it might take about 30-40 minutes, depending on how you like your lentils. You may need to add more stock or water, if needed, if it thickens too much before the lentils are cooked through, add in 1/2 cup at time, until it has a stew consistency and the lentils are cooked. Add in some parsley or coriander, taste, for seasoning. Serve warm. Enjoy! Lentil and Tomato Soup: This soup is a strange one. My husband and one of my sons, absolutely loved it, my other son and my daughter thought it was nice. I on the other hand, absolutely hated it. My whole family loved the spice mix in it, I could not stand it. I will share the recipe here with you today, as my family loved it, but in all honesty if I was ever going to cook this again for me, I would change the berebere spice mix to the one I posted above. But I will one day also make this for my family like this, as they really enjoyed it. Here is how I made it: Serves 6 185g (1 cup) brown lentils, soaked for 2 hours 2 tablespoons olive oil 1 brown onion, finely chopped 2 carrots, diced 2 celery stalks, chopped 2 garlic cloves, finely chopped 2 tablespoons berbere spice mix 400g tin crushed tomatoes 2 litres (8 cups) vegetable stock 1-2 potatoes, diced 2 tablespoons lemon juice Berbere Spice Mix: 1/8 teaspoon ground cloves 1/8 teaspoon ground allspice 1/4 teaspoon ground nutmeg 1/2 teaspoon ground coriander 1/2 teaspoon fenugreek 1/2 teaspoon freshly ground black pepper 1 teaspoon ground cinnamon 1 teaspoon ground cardamom 1 teaspoon ground ginger 2 teaspoons chilli flakes 1 tablespoon cayenne pepper 2 tablespoons hot paprika 1 tablespoon sweet paprika Zesty Yoghurt Topping: 90g (1/3 cup) plain yoghurt 3 tablespoons finely chopped flat-leaf parsley 1/2 lemon, zested Combine all the Berbere spice mix ingredients in a small bowl, mixing well. Set aside in a small airtight container. Soak the lentils in cold water for 2 hours. Heat the olive oil in a large saucepan over medium heat. Add the onion, carrot and celery. Cook for 10 minutes, stirring occasionally, until softened but not browned. If the vegetables begin to stick and brown before they are softened, add a tablespoon of water. Add the garlic and 2 tablespoons of the berebere spice mix and cook, stirring, for a further minute, or until fragrant. Stir in the tomatoes, drained lentils and stock. Bring to a simmer, then cover and reduce the heat to low. Simmer for 30–40 minutes, or until the lentils are tender. Add the potato and cook for a further 10 minutes. Stir in the lemon juice. Combine the topping ingredients in a small bowl. Serve the soup in individual bowls, with a spoonful of the zesty yoghurt on top. Enjoy! Eggplant and Tomato Salad: This makes quite a large salad, but what I love is that it keeps well in the refrigerator for days. I served it with different meats, beef, chicken etc, it's a lovely salad to go with a barbecue. I also enjoyed it with some flatbread as a light lunch. This is how I made it: Serves 6-8 4 eggplants 2 large zucchinis 1 red onion, sliced 2 green capsicums, chopped 6tomatoes, chopped 2 long green chillies, seeded, finely chopped 1/2 cup flat-leaf parsley, chopped 2 lemons, juiced 2 garlic cloves, crushed 80ml olive oil Cos lettuce leaves, red chilli and lime wedges, to serve Preheat oven to 180C. Place eggplants and zucchinis on a large oven tray. Prick all over with a skewer and roast for 1 hour or until skin is blackened and wrinkled, and the flesh is very tender. When cool enough to handle, halve the eggplants and zucchinis, and scoop out the flesh, discarding the skins. Chop flesh and place in a large bowl with the onion, capsicums, tomatoes, chillies and parsley. Whisk together lemon juice, garlic and olive oil in a small bowl. Season salad with salt and pepper. Drizzle dressing over salad and toss gently to combine. Cover bowl with plastic wrap and refrigerate until chilled. Arrange lettuce leaves on a platter, top with eggplant and tomato salad, and serve with chilli and lime wedges. Enjoy! Now to add another sticker to my world map. Next stop Benin
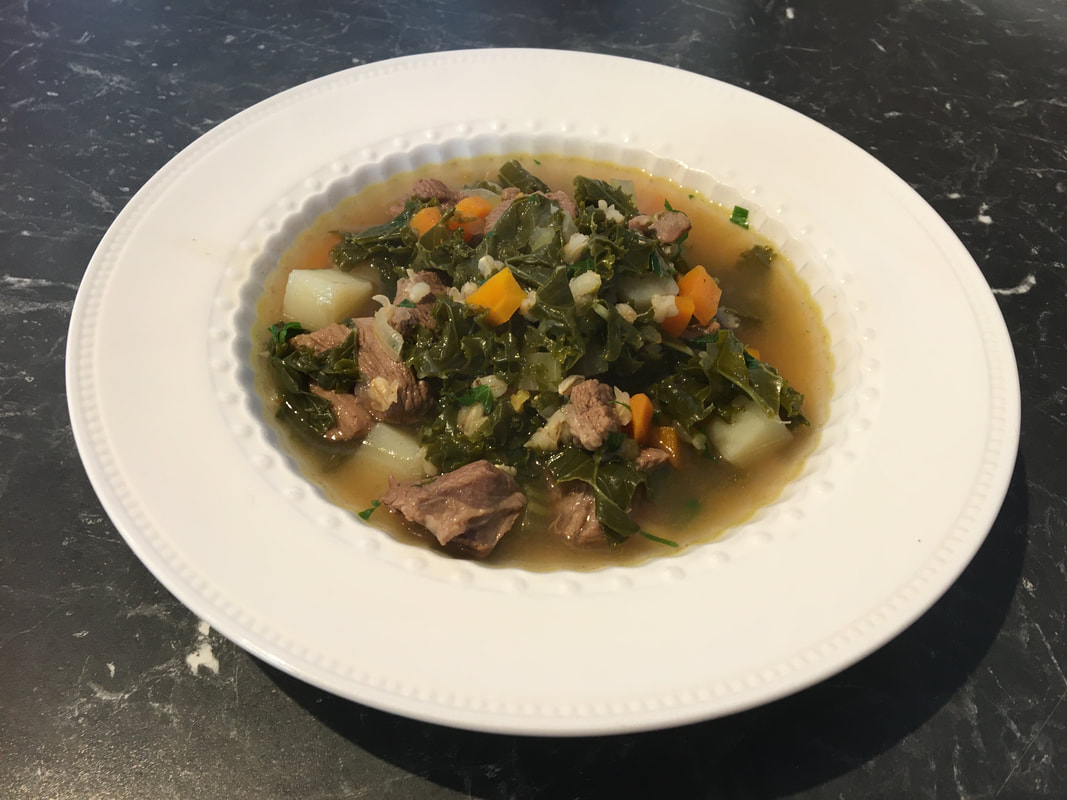
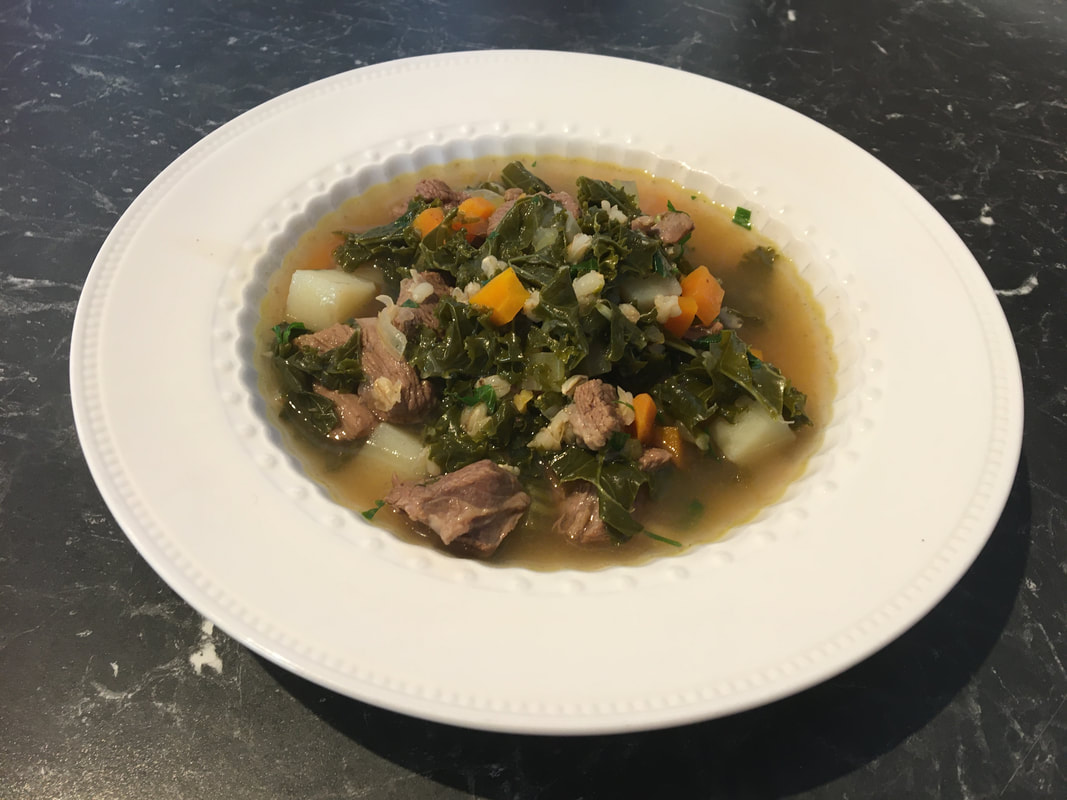
There is a new favourite soup in my house. One day my thirteen year old was flicking through a cookbook and found this recipe. He decided he wanted to cook this for dinner. We had cavolo nero and kale growing in our garden so it was decided this was going to be made. Now originally this was a pressure cooker soup, but as I am one of those people that does not have one, we made this in a large pot and adjusted the way it was cooked. We loved it. Everyone loved the flavour, it is kind of a meal in itself, as it is a hearty soup. You can use kale instead of cavolo nero, they are perfectly interchangeable. This is a nice, hearty soup that my family love, hope yours does to. RecipeRecipe adapted from The Australian Women's Weekly Cookbook 'Express' Serves 6 1 tablespoon olive oil 1kg beef chuck steak, cut into 2cm pieces 1 large onion (200g), chopped 2 cloves garlic. crushed 2 litres (8 cups) water 2 cups (500ml) beef stock 1 teaspoon vegeta, optional 1/2 cup (100g) pearl barley 2 stalks celery (300g), trimmed, coarsely chopped 1 large carrot (180g), diced 3 cups (240g) coarsely shredded cavolo nero (tuscan cabbage) 3/4 cup coarsely chopped fresh flat leaf parsley Heat oil in a large saucepan, cook beef, in batches, until browned. Return all the beef to the saucepan with the onion and garlic, stir for 2 minutes. Add the water, stock and vegeta, if using. Cover with a lid, bring to the boil, once boiling, reduce the heat and simmer for 1 hour and 30 minutes. Add the barley, celery and carrot. Cover with a lid, bring to the boil, reduce the heat, simmer for a further 25 minutes. Add the cavolo nero, return the soup to the boil, cook for 5 minutes or until the cavolo nero has softened. Season to taste. Just before serving, stir in the parsley. Enjoy! To save the recipe to your favourites go www.whatscookingella.com/beef-barley-and-cavolo-nero-soup.html
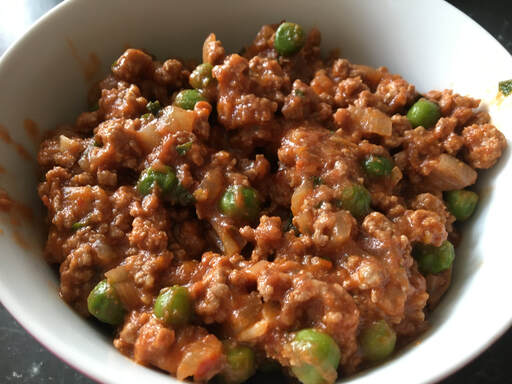
Pin it: www.pinterest.com.au/pin/399413060708143522/ Here is a easy meat pie recipe that I'm sure you will love. This is an easy alternative to the traditional meat pie. The filling is super quick and easy to make, then you just enclose it in puff pastry, bake it and you have your family fed in no time. This is great when you have kids friends over as it's cheap and easy to make. I say makes 12, but I think I actually got 14 out of the mix as I didn't overfill the 1/4 cup per pastry. So have an extra sheet of pastry on hand, if needed. If you need to make 12 then do so, but when I make these just for my kids, I bake 6 one day, then just refrigerate the filling and make fresh ones the next day. I prefer pastry freshly baked. This is great on the weekend or during school holidays as it is quick and easy to make, and if your kids are like mine and they are always hungry, a simple recipe is needed and these are filling. My family loved these, hope yours do to. RecipeRecipe adapted from The Australian Women's Weekly Cookbook 'Express' Makes 12 2 teaspoons olive oil 1 small onion (80g), chopped finely 1 clove garlic, crushed 500g beef mince 2 tablespoons tomato paste 2/3 cup (170g) tomato passata 1/2 teaspoon vegeta (optional) 1/2 cup (60g) frozen peas 1/3 cup finely chopped fresh flat leaf parsley 3 sheets puff pastry 1 egg, beaten lightly Tomato Sauce, to serve Heat oil in a large frying pan over medium-high heat. Cook onion and garlic, stirring for 3 minutes or until the onion softens. Increase heat to high, add beef, cook, stirring, for 5 minutes or until beef is browned. Add paste, stir through for 1 minute. Add passata, vegeta, if using and 1/2 cup water. Simmer for 15 minutes. Add peas, cook, stirring, until heated through about 5 minutes, until the mince mixture is thick. Remove from heat, stir in parsley. Season, to taste. Allow to cool. Preheat oven to 200C/180C fan forced. Line two baking tray with baking paper. Cut each pastry sheet into quarters, you will have 12 squares. Spoon 1/4 cup of the beef mixture into the centre of each square. Brush edges with a little egg, fold pastry in half diagonally to enclose filling, pinch edges to seal. Then use a fork to completely seal the edges. Place pies on prepared trays, brush with egg. Bake for 20 minutes or until browned. Allow to cool for 5 minutes. Serve with tomato sauce. Enjoy! To save the recipe to your favourites go www.whatscookingella.com/beef-and-pea-hand-pies.html
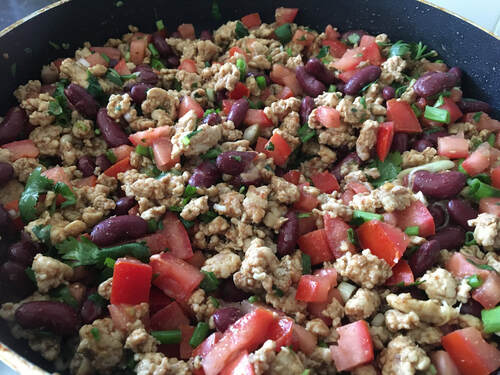
Pin it: www.pinterest.com.au/pin/399413060708130174 Dinner time has always been a big event in our day, it is the meal I spend most of my time making and it is the time of the day we all get together to share the meal that I prepared and talk about our day. Well 2020 is the year that I also have kids in the house during the day also. One has been home all year doing university on line. One just finished year 12 and is in the process of sitting her final exams and will be home for the next few months (I still have one that leaves the house as he still goes to school). It's the older two that I now have to feed during the day. Quite often they fend for themselves, but every now and then I find a recipe like this that is quick and easy to make and one I know they will love, so I make it for them while they study. These chicken quesadillas are delicious. I love that they are made in a sandwich press as you don't have to flip them, like you would if you made them in a frying pan (though if you don't have a sandwich press, you can make them in a frying pan). I also love that after I make the filling, I just allow the mixture to cool and then my kids when they are hungry, just assemble and cook their own quesadillas. You can buy chicken mince or like I did once, when I had chicken thigh fillets in the refrigerator, I just pulsed them in a food processor and made my own mince. If you want you can serve these for dinner obviously, I would just serve it with a green salad with cucumbers, to make it a complete meal. Now I say it makes 4, that's if you use 19cm flour tortillas. I actually prefer the smaller ones and I get 6 quesadillas. Which size you prefer is up to you. This is easy and delicious, something you need to try soon. RecipeRecipe adapted from The Australian Women's Weekly Cookbook 'Express' Makes 4 1 medium avocado (250g), chopped 1 tablespoon lemon juice 1 cup loosely packed fresh coriander leaves 1 tablespoon vegetable oil 500g chicken mince 3 teaspoons ground cumin, to taste 2 teaspoons ground coriander, to taste 1/2-1 teaspoon cayenne pepper, optional 400g can red kidney beans, drained, rinsed 3 medium roma tomatoes (225g), chopped finely 3 green onions, sliced thinly 3/4 cup loosely packed coriander leaves 8 x 19cm flour tortillas 1 cup (120g) grated cheddar Lemon wedges, for serving, Sour cream, for serving Combine avocado and lemon juice in a small bowl. Mash into a chunky mash. Add coriander leaves, season to taste, stir it all together. Set aside until needed. Heat oil in a frying pan, cook chicken, stirring, until browned and cooked through. Add cumin, coriander and cayenne pepper, if using, cook, stirring, for 1 minute or until fragrant. Stir in beans, tomato, green onion and fresh coriander leaves. Season to taste with salt and pepper. Remove pan from heat. Preheat sandwich press. Sprinkle a little cheese on four flour tortillas, now divide chicken mixture on the cheese, sprinkle with remaining cheddar. Top with remaining tortillas. Cook one at a time in a sandwich press, for 2 minutes or until cheddar is melted and tortillas are browned lightly. Cut quesadillas into quarters, serve with avocado mixture, lemon wedges and sour cream. Enjoy! To save the recipe to your favourites go www.whatscookingella.com/sandwich-press-chicken-quesadillas.html
Pin it: www.pinterest.com.au/pin/399413060708131480 |
AuthorI am simply someone who loves to cook, and loves seeing my family and friends enjoy my food. Instagram
Whatscookingella Archives
July 2024
Categories |





















 RSS Feed