Boob Cake
This cake is a celebration cake for my dear friend who had breast cancer.
After months and months of surgeries and doctors appointments she threw a party to celebrate her recovery and her life (I will mention I had so much fun at this party). A friend of mine suggested I make a boob cake for her, so as per usual I said yes, having no idea how to make one.
So off I go to my friend Google (how did we survive without it) and I looked up boob cakes, there were many to choose from. I gave the birthday girl a pick of five cakes and she chose this one.
No recipe came with the cake, so I had to come up with one. At first I thought red velvet cake, when you slice into it, it would be red like blood, but then I thought too gory. So I settled for a chocolate mud cake, but I need to figure out how long to bake it in the dome tin.
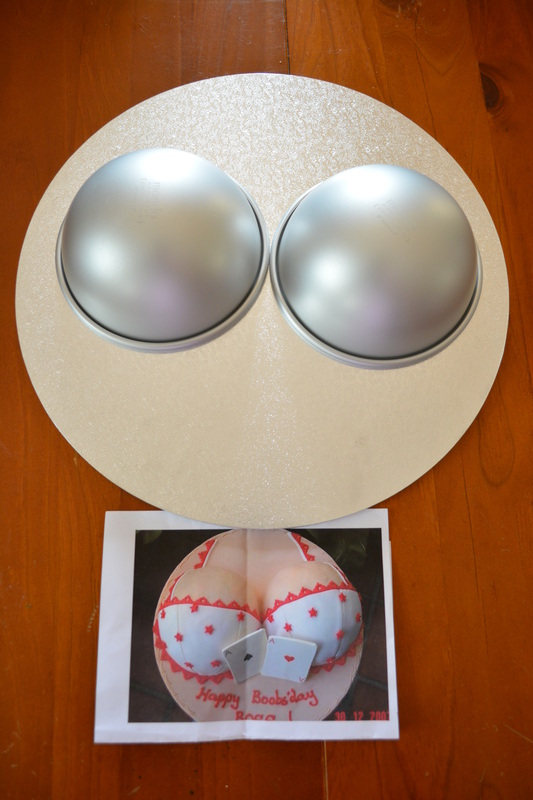
I again headed over to Cake Decorating Solutions in Rosebery (NSW) and got the cake tins and advice from my favourite cake lady there. She suggested I use real lace instead of making it out of fondant, so I did. She also gave me a huge tip in when I go to bake the cakes, place the dome tins on egg rings so they can stay straight, would not have thought of that. If you are going to try and attempt this cake, you can email me for any help, I am happy to explain anything unclear.
Fully armed with everything I need, it was time to make the cake.
So here is a cake for one of the strongest people I know, we had a great food journey together, I fattened you up during your recovery (now she makes me walk with her to get the weight off) and we ended this chapter of your life with one great party.
Cheers to the years ahead of us!
Recipe
This recipe is 100% my recipe, although I did look at boob cakes on pinterest for ideas.
Serves 10-15
Equipment:
Cake Board
Dome tins
Fondant smoother
Fondant mat
Cake:
1 x Chocolate Mud Cake (see my Chocolate Mud Cake Recipe)
1 x White Chocolate Ganache (see my white chocolate mud cake recipe)
Decorations:
Ivory Vanilla fondant
White Vanilla Fondant
Red Lace Trim
Serves 10-15
Equipment:
Cake Board
Dome tins
Fondant smoother
Fondant mat
Cake:
1 x Chocolate Mud Cake (see my Chocolate Mud Cake Recipe)
1 x White Chocolate Ganache (see my white chocolate mud cake recipe)
Decorations:
Ivory Vanilla fondant
White Vanilla Fondant
Red Lace Trim
Equipment and Idea
Notes on baking the cake: The cake recipe can be found at www.whatscookingella.com/chocolate-mud-cake.html
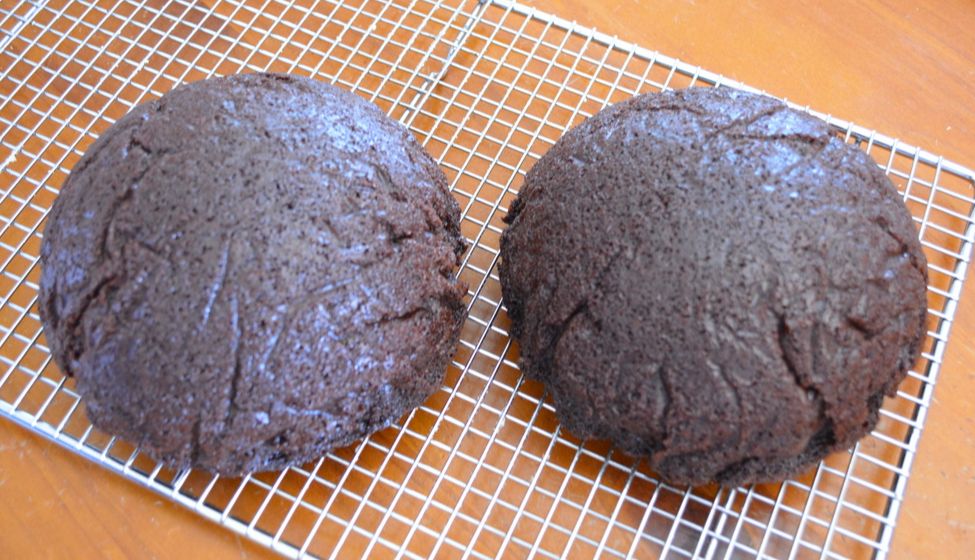
The cake mix is enough to make 3 'boobs', which I liked as I got to try one, to make sure it was baked right.
I greased and lined with baking paper the tins as I didn't want to take the chance that I couldn't get the cakes out of the tins, but by doing this you can see the bumps from the paper in the cake below. You should be able to grease and dust with flour the tins, shaking out the excess flour, then pour the batter straight in. They should come out, how you do it is up to you. If you do want to line the tins with baking paper as a precaution, scrunch up the paper and wet it until it becomes 'softer' wipe off with paper towels any excess water and line the tin, it is far easier when the paper has been 'softened'. These cakes can be made at least 4 days before needed, once completely cooled, cover, and refrigerate. You can even leave them out of the refrigerator.
Preheat your oven to 160C/140C fan forced. Make the cake mix as per recipe. Place two egg rings on a baking tray, place your dome moulds on the egg ring, so they are level. Pour the cake mix into the moulds 3/4 of the way up.
Bake in the centre of your oven for 1 hour, or until the cake is cooked through, press on it gently, it will feel cooked, or test with a skewer. Allow to cool for 30 minutes in the tins, then place on a wire rack to cool completely. (Make the third boob or cupcakes out of the remaining mix).
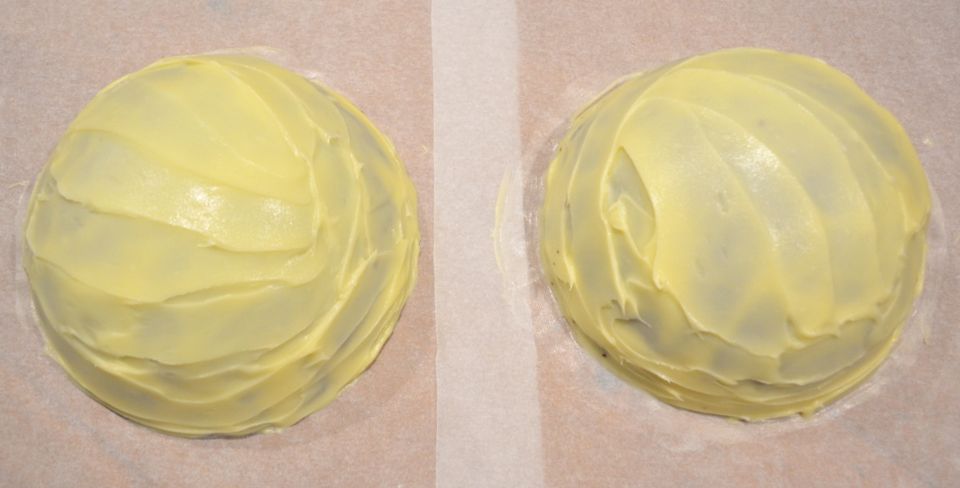
Make the ganache as per recipe you can find at www.whatscookingella.com/white-chocolate-mud-cake.html. Follow the instructions until you have reached a spreadable consistency. Carefully spread the ganache over each 'boob', make sure any dents in the cake are filled. You need a good, smooth ganache as a base for the fondant, so take care with this step. Refrigerate for 30 minutes.
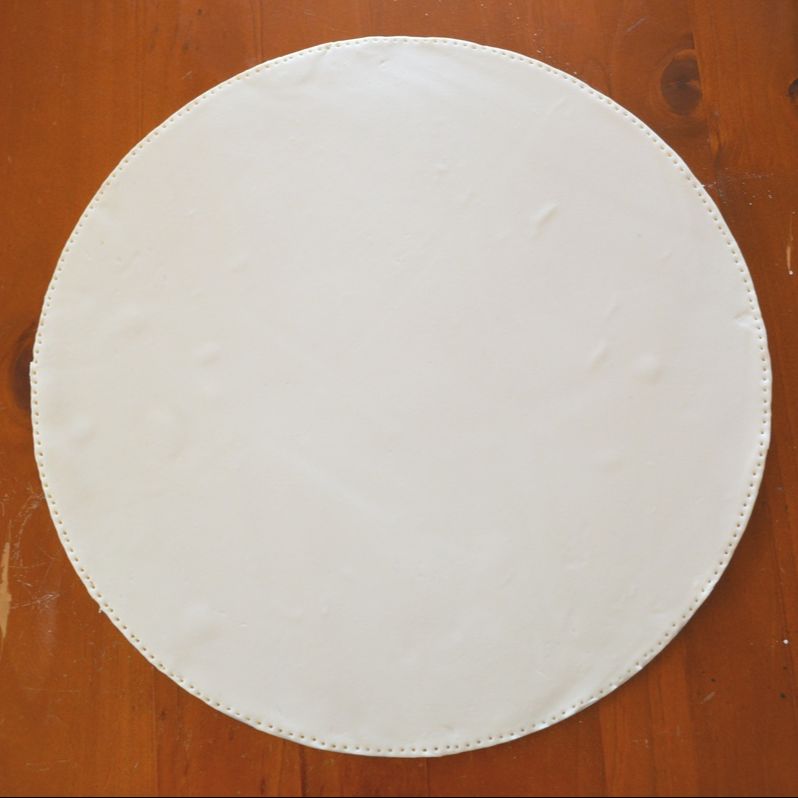
Cover the board: Take enough ivory fondant out of the packet to cover the board, I did not weigh it, so I can't tell you the exact amount.
Knead it gently until it is smooth and elastic. Dust a fondant mat with sifted icing sugar, and gently roll out the fondant to about 1/2cm thick. Using the rolling pin as an aid, loosely roll the fondant around the rolling pin to help you lift and place the fondant over the cake board. Using a knife, trim off any excess fondant, you can use this to cover the boobs. I used a fork to decorate the edge of the board, you can see the dots. If you have decorating tools on hand, decorate as you like.
Knead it gently until it is smooth and elastic. Dust a fondant mat with sifted icing sugar, and gently roll out the fondant to about 1/2cm thick. Using the rolling pin as an aid, loosely roll the fondant around the rolling pin to help you lift and place the fondant over the cake board. Using a knife, trim off any excess fondant, you can use this to cover the boobs. I used a fork to decorate the edge of the board, you can see the dots. If you have decorating tools on hand, decorate as you like.
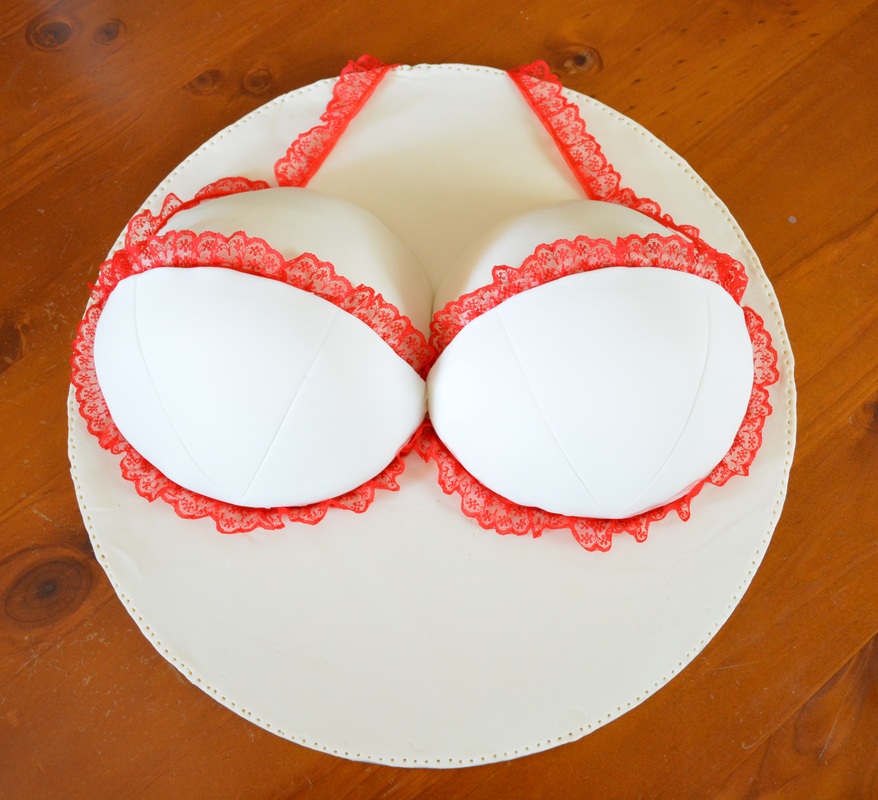
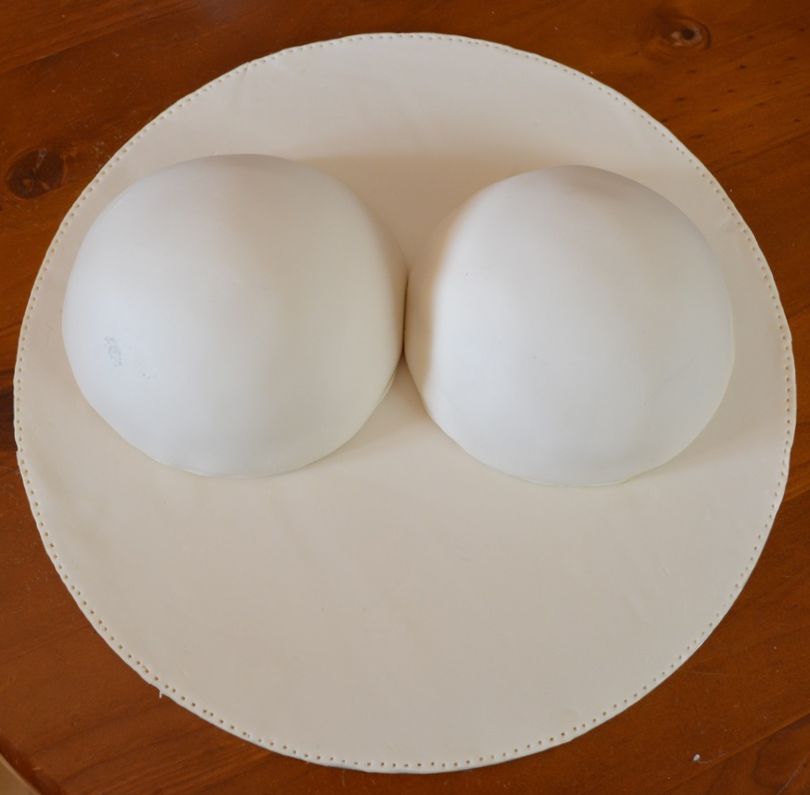
Covering the boobs: Roll out more of the ivory fondant on your fondant mat, in a circle shape about 1/2 cm thick to cover one boob. Carefully lift and place over the boob. Using a fondant smoother smooth the fondant around the cake, cutting off any excess fondant as you go. Tuck the bottom rim of the fondant gently under the cake. Repeat with the second boob.
Now we start to make the bra. Roll out the white fondant on your fondant mat, big enough to cover the bottom half of the boob. Now with the back of a knife (so you don't cut your mat), near the top part of your rolled fondant, cut a straight line across the fondant, the line needs to be long enough to go from one side of the boob, to the other side (this is the top line of the bra). Carefully lift the fondant and position the bra over one boob, smooth out with a fondant smoother, cut off any excess fondant, tuck fondant rim under cake. Repeat with the second bra cup.

Positioning the lace: This was actually quite tricky, as the lace does not always want to cooperate. Start with the base of the boobs, and using a skewer you need to carefully push the edge of the lace under the boob into the fondant. It takes time, don't rush it. Next do the same for the top part of the boob, again don't rush it, you don't want to ruin all your hard work. Next do the strap. I actually used sticky tap to stick it to the underside of the board, then I did the strap down to the boob, tucked it in there carefully, then continued down the boob to the lace at the top of the bra, tucking it in as I go.
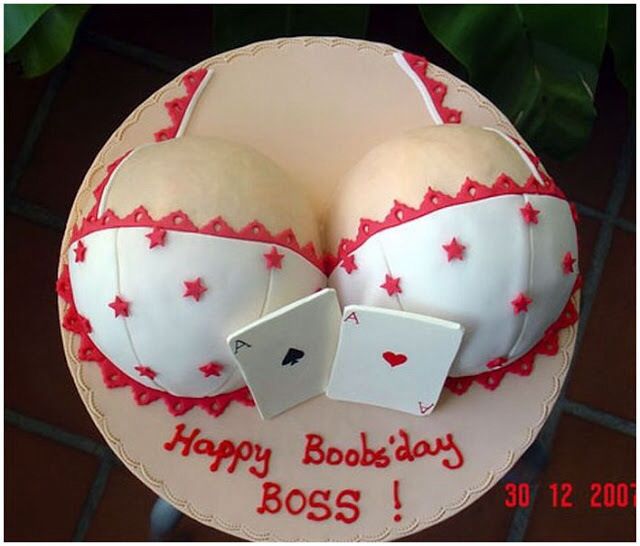
You can then roll out a rectangle or square, allow it to dry a little where you can write a personalised message like Happy Boobday etc And then stick it down with a little water at the base of the board, under the boobs. I ran out of time for that.
You can then roll out a rectangle or square, allow it to dry a little where you can write a personalised message like Happy Boobday etc And then stick it down with a little water at the base of the board, under the boobs. I ran out of time for that.
Enjoy!
