Sea Shell Cake
Each year my kids get to pick the cake they want for their birthdays. This year my daughter wanted a beach themed cake, so she chose this one out of a cake book I have.
But the twist this year is she saw a checkerboard cake design on a baking show we were watching and asked for that. I thought ok, lets give it a go.
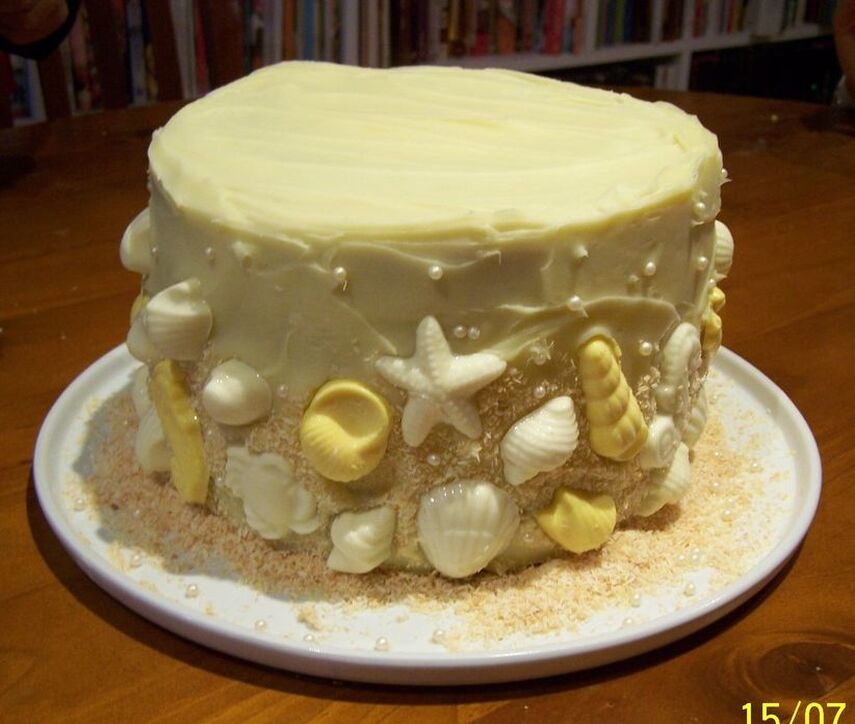
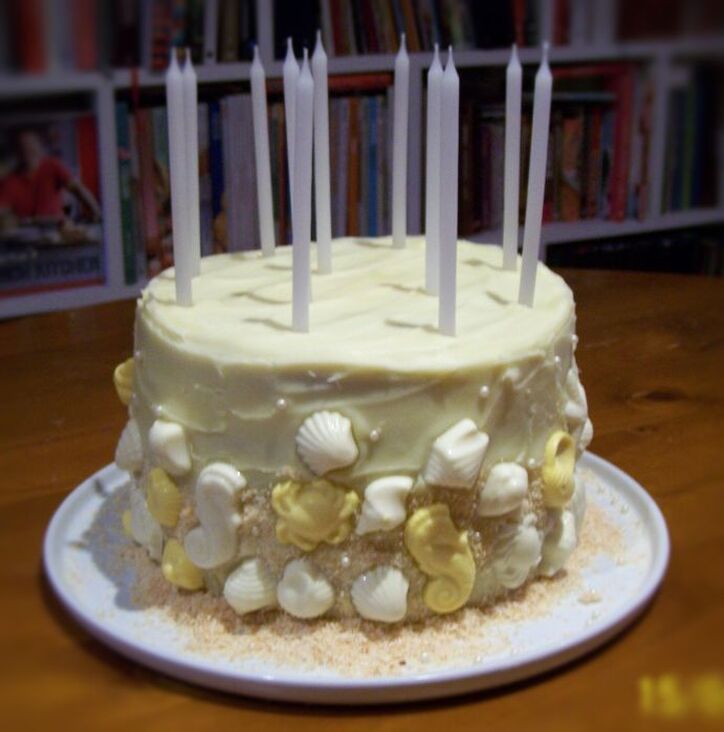
This is our finished product. We used the double decker mud cake recipe, as she likes it. But when we made it, the cake was not tall enough, with only the two cakes, so we had to make another batch. So there are actually
4 x 20cm cakes all up.
It is easier than I thought it would be, takes a bit of time, but you can start the cake baking process 3 days before needed.
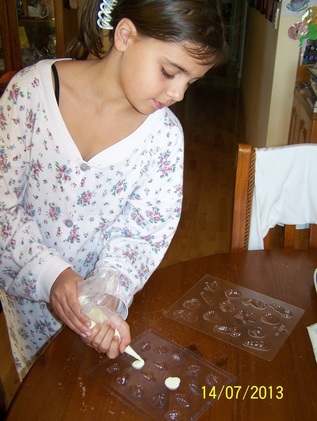
Emalee (my daughter) made the chocolates all by herself, and that can be done up to a week earlier. The shell moulds I found on eBay, didn't cost much at all.
My kids love the cakes I make, they are by no means as perfect as store bought cakes, but they are always happy with the design, and love the flavour.
Recipe
Recipe design adapted from The Australian Women's Weekly cookbook 'More Cakes for Kids'
Cake design adapted from the cookbook 'The Great Australian Bake Off'
Equipment:
2 x 20cm round cake tins
30cm prepared cake board or plate
Shell shaped chocolate moulds
Cake:
2 x Double Decker Mud Cake recipe (makes 4 cakes)
1 x Chocolate Ganache (see chocolate mud cake recipe)
2 x White Chocolate Ganache (see white chocolate mud cake recipe)
Decorations:
375g white chocolate melts
Yellow food colouring
1/2 cup desiccated coconut, toasted
45 pearl balls
Candles
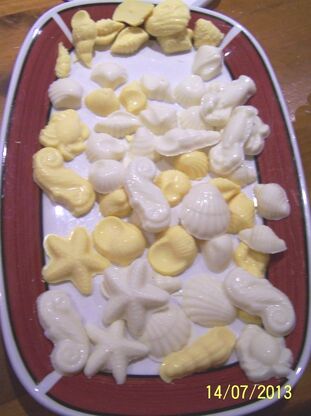
First I make the white chocolate shells, as this can be done up to a week before they are needed.
Place the white chocolate in a heatproof bowl over a pan of simmering water. Don't let the water touch the bowl. Stir until melted.
Pour half of the chocolate into a piping bag, and pipe it into the shell moulds. you can use a teaspoon to do this, but it was easier to use a piping bag. Refrigerate until set.
Tint the remaining white chocolate with the yellow food colouring, pipe into the remaining moulds. Refrigerate until set.
Make the double decker mud cake recipe twice (up to the step where it is baked and cooling). I made one, 3 days before, and the other 2 days before.
Now to checkerboard your cakes.
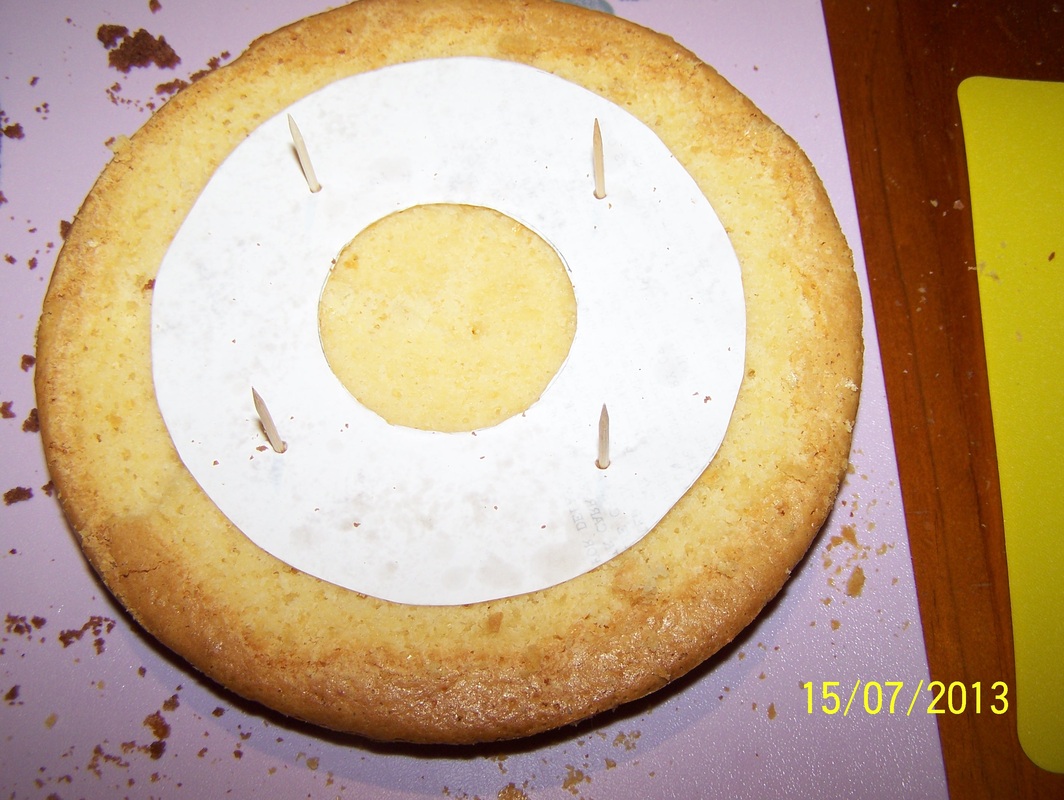
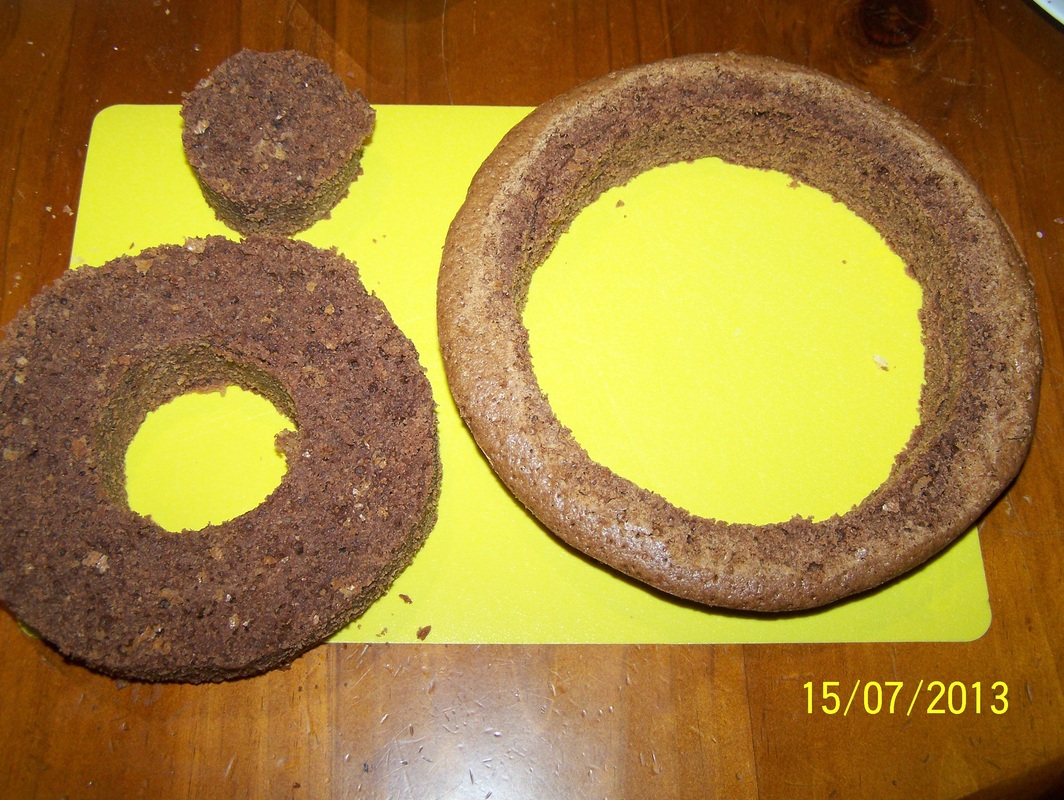
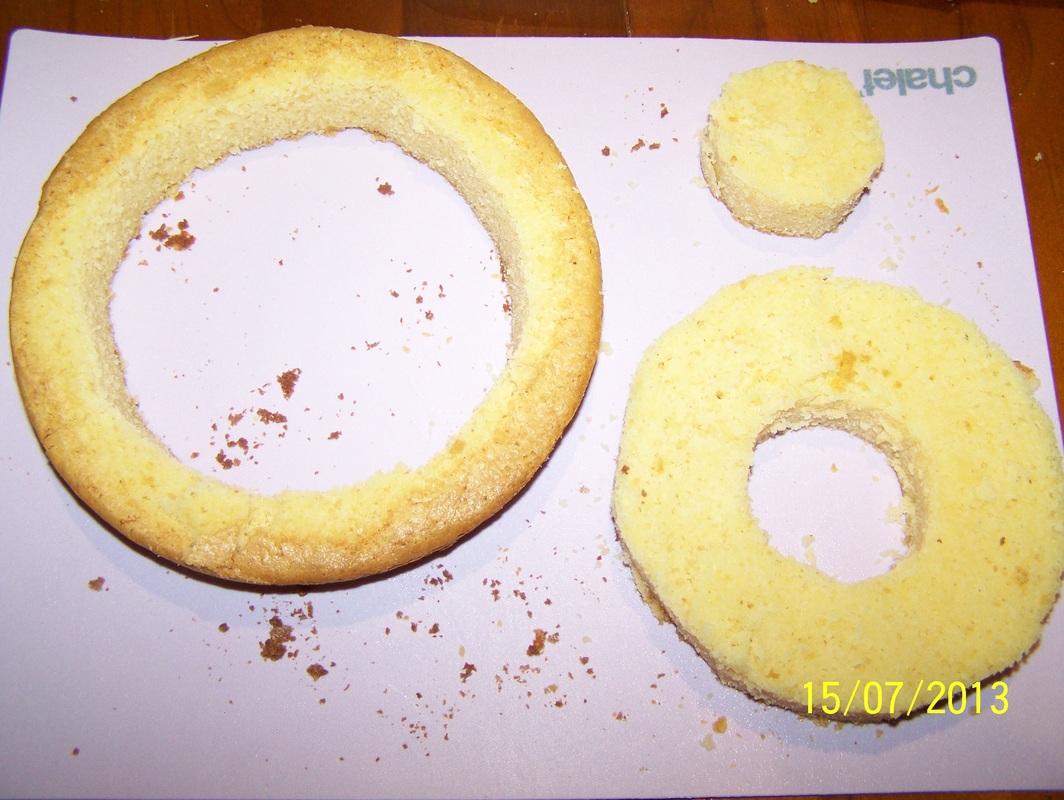
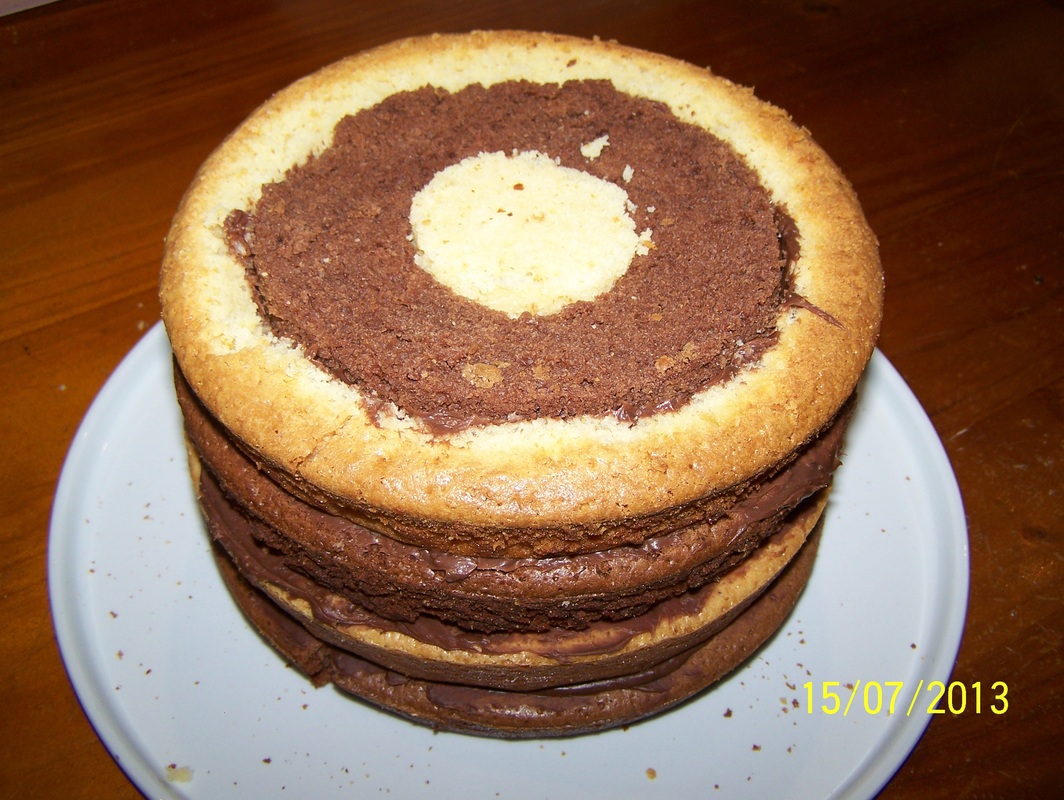
First make a template for your cake. I made this by placing a piece of paper on my cooled cake, cut the paper to the size of the cake. Then I measured in from the edge to make the rings, see the picture below as a guide. I used a compass to make the circles, then cut out the doughnut shaped rings as pictured below.
Level the tops on your 4 cakes. Place your template on one of your cakes as picture below, secure it with 4 toothpicks. Carefully cut the cake into 3 rings. You only cut around the outer edge of the paper template and around the inner edge of your template. Repeat with your remaining three cakes.
Once all is cut you will have 4 x large rings, 4 middle rings and 4 x centre circles.
Make your chocolate ganache, it needs to be refrigerated until it is of a spreadable consistency.
Once all your cakes have been cut, you need to assemble the cakes.
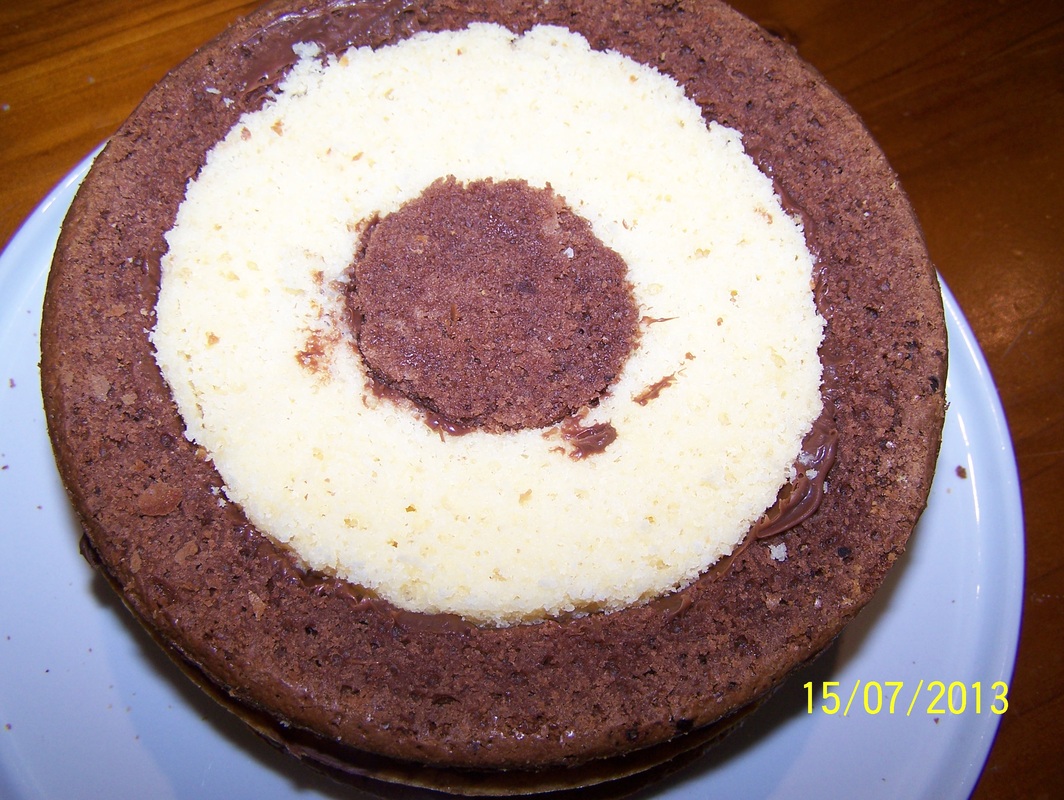
Coat the sides of a chocolate centre circle with some of the ganache. You need enough ganache that will ensure when the cake is sliced it does not fall apart. Place the chocolate centre circle inside a white chocolate middle ring. Now coat the edge of the white chocolate middle ring with the ganache and place it inside a chocolate large ring.
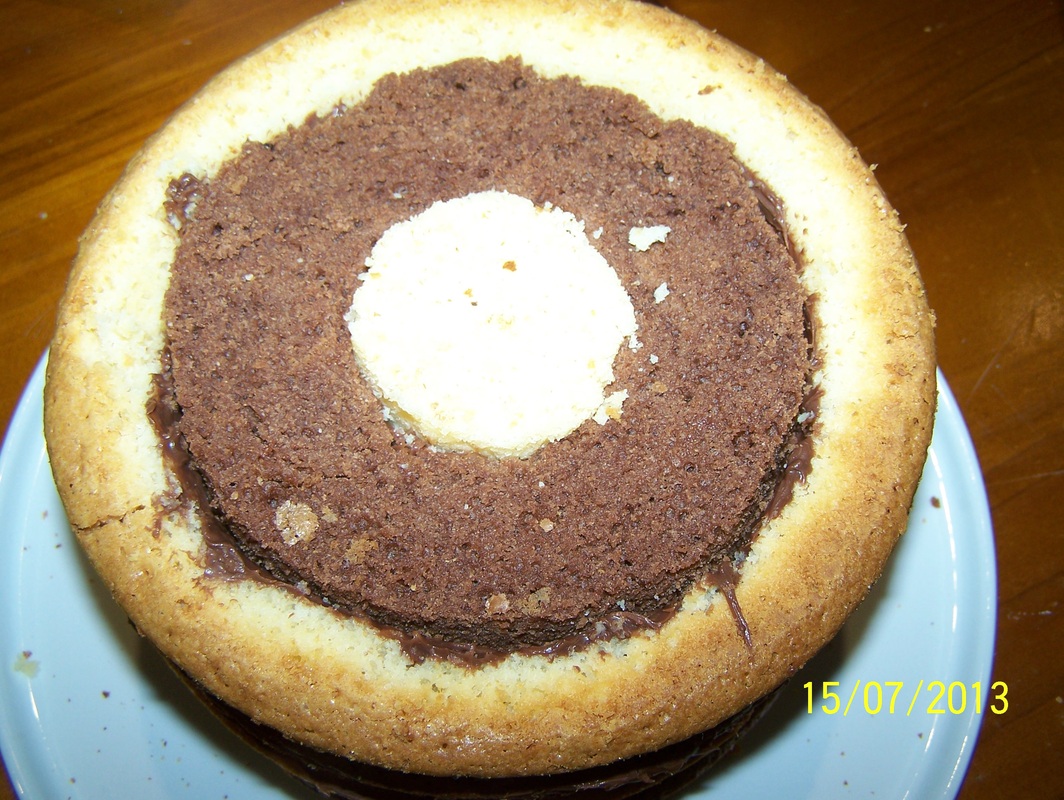
For the opposite cake, you just place the white chocolate centre, ganached into a chocolate middle ring, ganached into a white chocolate large ring.
Use the pictures below as a guide.
Now sandwich the cakes together with more of the chocolate ganache, remember to use enough ganache so that the cake does not fall apart when sliced. Make more ganache if needed.
Toast the coconut, I did it in a frying pan over medium heat, moving it around until it is lightly browned all over, place in a bowl to cool.
Make the white chocolate ganache, as per recipe. I make 2 times the recipe to ensure I have enough, leftover ganache can be refrigerated and used again later in the week.
The ganache needs to be refrigerated until it is of a spreadable consistency.
Spread a thin layer of the ganache all over the cake and refrigerate for 15 minutes. This ensures all the cake crumbs stick to this layer of ganache and don't ruin your final layer.
Place your cake on your cake board. Spread a thickish layer of ganache all over the top and sides of the cake, make sure you cannot see the cake underneath.
Using the picture below as a guide, position the chocolate shells around your cake. Sprinkle with the toasted coconut and decorate the cake with the pearl balls.
Enjoy!
